
A young friend recently spent a week learning about radio astronomy at the Green Bank Observatory in West Virginia. His experience prompted me to ask: How big a radio antenna would you need to observe anything interesting? It turns out the answer is a half meter across. For less than US$150 I built one that size, and it can easily detect the motions of the spiral arms of the Milky Way galaxy. Wow!
My quest began with a used satellite-TV dish and a “cantenna” waveguide made from a coffee can placed at the dish’s focus. Unfortunately, I had to abandon this simple approach when I figured out that a coffee can was too small to work for the wavelength I was most interested in: 21 centimeters. That is the wavelength of neutral hydrogen emissions, a favorite of radio astronomers because it can be used to map the location and motion of clouds of interstellar gas, such as those in the spiral arms of our galaxy.
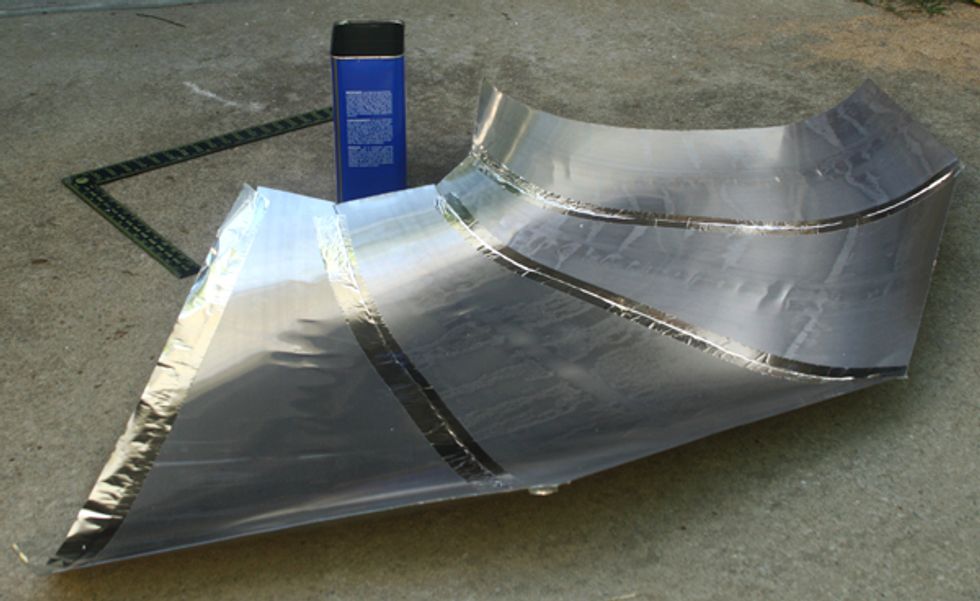
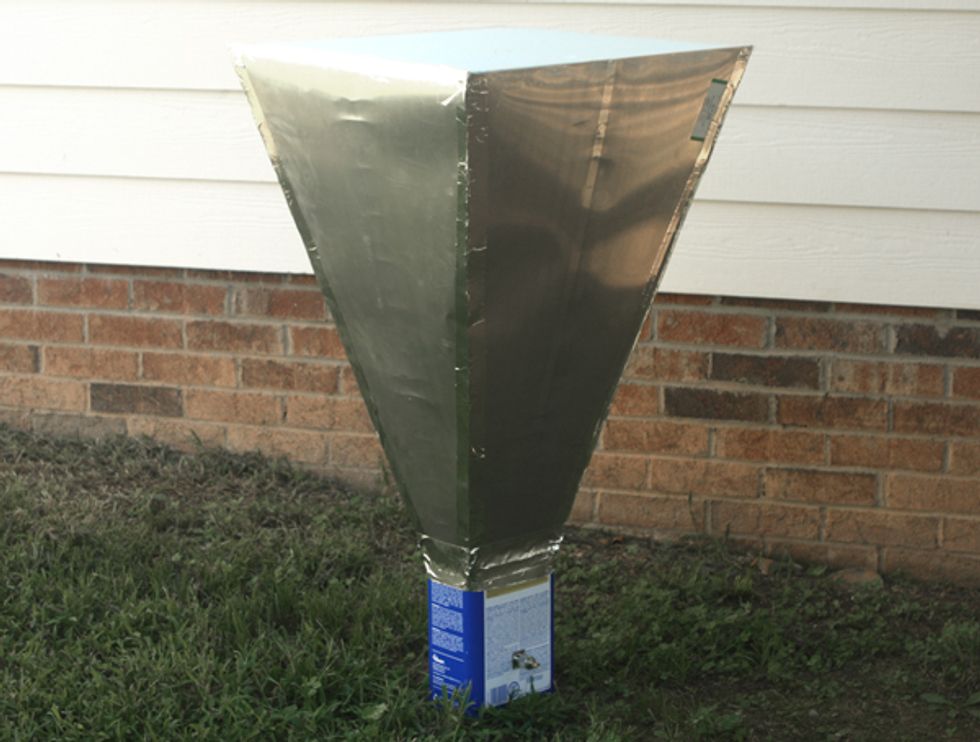 Pyramid Scheme: Four pieces of aluminum flashing form the antenna horn (top). The narrow end of the horn is attached to a waveguide made from an empty paint-thinner can (bottom).Photos: David Schneider
Some research revealed that amateur radio astronomers were having success with modest horn antennas. So I copied the example of many in an online group called Open Source Radio Telescopes and purchased some aluminized foam-board insulation as antenna construction material. But I was troubled when my multimeter showed no evidence that the aluminized surface could conduct electricity. To make sure the material would have the desired effect on radio waves, I built a small box out of this foam board and put my cellphone inside it. It should have been completely shielded, but my cellphone received calls just fine.
That experiment still perplexes me, because people definitely do build radio telescopes out of aluminized foam board. In any case, I abandoned the board and for $13 purchased a roll of 20-inch-wide (51-centimeter-wide) aluminum flashing—the thin sheet metal used to weatherproof tricky spots on roofs.
The width of my roll determined the aperture of my horn’s wide end. The roll was 10 feet (3 meters) long, which limited the length of the four sides to 75 cm. An online calculator showed that a horn of those dimensions would have a respectable directional gain of 17 decibels. Some hours with snips and aluminized HVAC tape ($8) resulted in a small horn antenna. Attaching a square of ordinary foam board (not the aluminized kind) to the open end made it plenty robust.
I also purchased a 1-gallon can of paint thinner ($9) and gave away its contents. The empty can serves as a waveguide feed at the base of the horn antenna. A handy online waveguide calculator told me this feed would have an operating range that nicely brackets the neutral-hydrogen line frequency of 1420 megahertz.
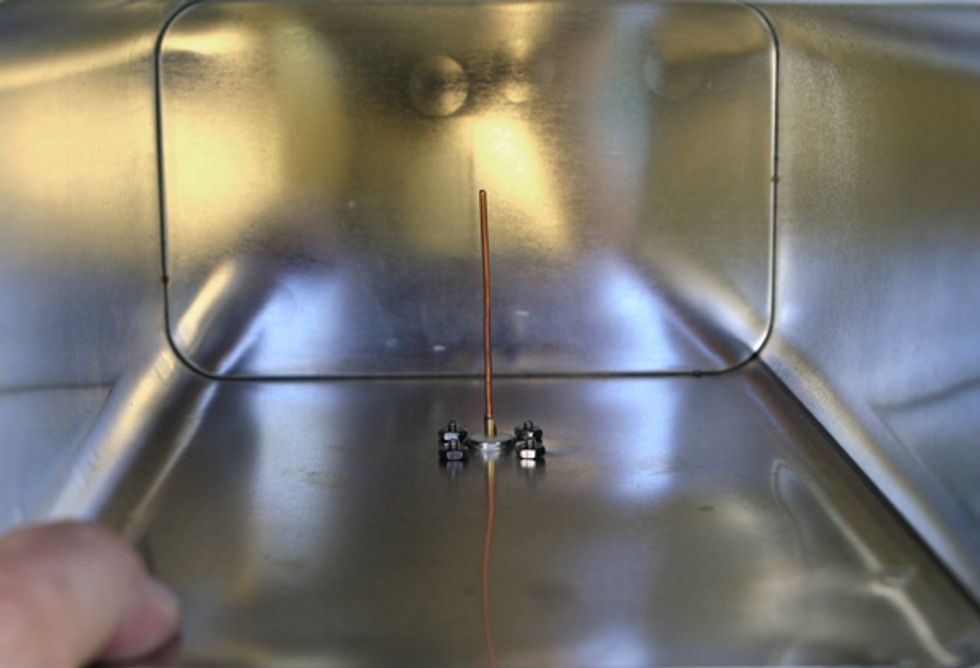
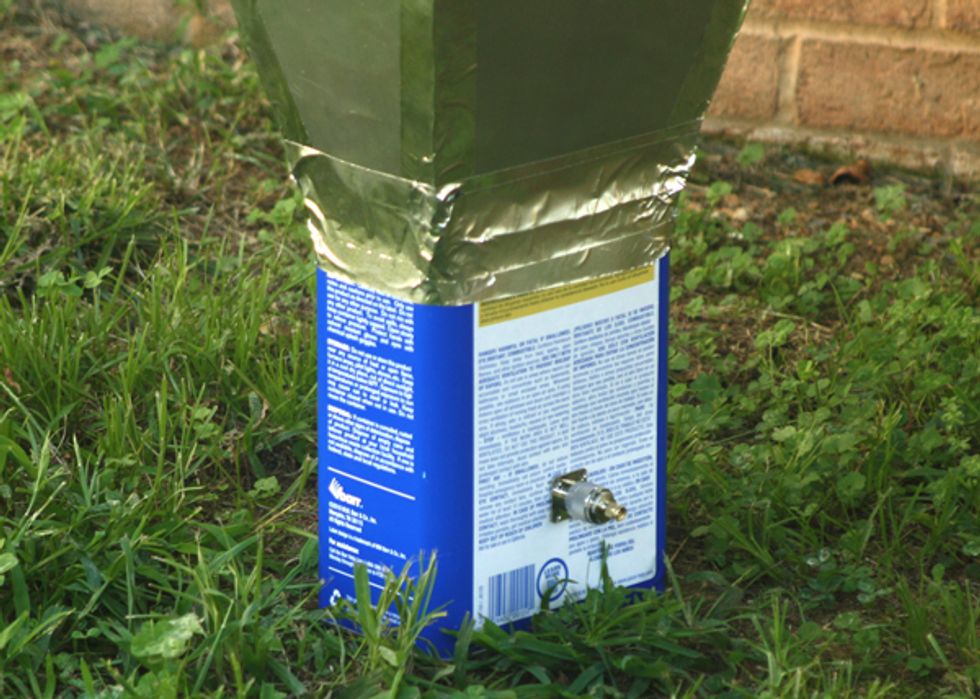 Signal Plumbing: The signal is picked up by a wire projecting into the waveguide (top) and sent to a receiver via a coaxial cable attached to a bulkhead connector (bottom).Photos: David Schneider
Some folks contributing to Open Source Radio Telescopes were using similar cans. But none of the projects’ documentation showed exactly how to construct the feed’s “pin”: the part that picks up signals inside the waveguide and passes them to the telescope’s receiver. Many cantenna tutorials say to make the pin a quarter of a wavelength long, which in this case works out to 53 millimeters. The tricky part is figuring out where to place it in the can—it needs to be a quarter of a wavelength from the base. However, in this case the relevant wavelength isn’t 21 centimeters but what’s called the guide wavelength, which corrects for the difference between how the signal propagates in free space versus inside the waveguide. An online tutorial and another calculator showed the appropriate distance from the base to be 68 mm. So that’s where I drilled a hole to accommodate an N-type coaxial bulkhead connector that I had purchased on Amazon.com for $5, along with an N-to-SMA adapter ($7).
For my receiver, I went with a USB dongle that contains a television tuner plus a free software-defined radio application called HDSDR. (The software was chosen on the basis of a report from two amateur radio astronomers in Slovenia who had used it to good effect.)
I purchased the dongle from Nooelec.com ($37) because that company had also recently started selling a gizmo that seemed perfect for my application: It contains two low-noise amplifiers and a surface-acoustic-wave (SAW) filter centered on 1420 MHz ($38). The dongle itself provides power for the amplifier through the coaxial cable that connects them, a 30-cm (12- inch) length of coax purchased on Amazon.com ($9). The dongle just sits on the ground next to my horn and is attached to a Windows laptop through a USB extension cable.
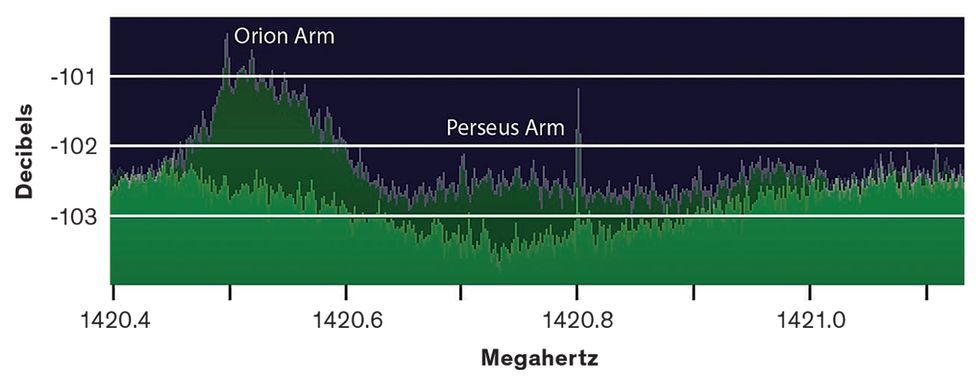 Spiral Arms: The antenna can detect emissions from the hydrogen gas in nearby arms of the galaxy: Dark green (above) represents the signal from the sky; light green shows the baseline system response with no signal.
At my instrument’s “first light,” I was able to detect the neutral hydrogen line with just a little squinting. After getting more familiar with the HDSDR software, I figured out how to time-average the signal and focus on the spectral plot, which I adjusted to display average power.
This plot distinctly showed a hydrogen “line” (really a fat bump) when I pointed my horn at the star Deneb, which is a convenient guide star in the constellation of Cygnus. Point at Cygnus and you’ll receive a strong signal from the local arm of the Milky Way very near the expected 1420.4-MHz frequency. Point it toward Cassiopeia, at a higher galactic longitude, and you’ll see the hydrogen-line signal shift to 1420.5 MHz—a subtle Doppler shift indicating that the material giving off these radio waves is speeding toward us in a relative sense. With some hunting, you may be able to discern two or more distinct signals at different frequencies coming from different spiral arms of the Milky Way.
Don’t expect to hear E.T., but being able to map the Milky Way in this fashion feels strangely empowering. It’ll be $150 well spent.
This article appears in the October 2019 print issue as “Build Your Own Radio Telescope.”


