
Halloween is approaching, and with it a global parade of costumes. So I thought this would be the perfect time to try out a new wearable microcontroller from Adafruit Industries: the Gemma M0.
Adafruit has been putting out wearable microcontrollers for several years. These differ from conventional controllers, such as the Arduino Uno, in that the wearables are typically more compact and use pads with large through holes for input and output, instead of pins. These holes make it easy to sew boards to fabric or tie conductive thread to the pads. What makes the Gemma M0 particularly interesting is that it runs CircuitPython, Adafruit’s modified version of the Python language designed for embedded devices. (At this point, I should note that Limor Fried, the founder of Adafruit, is a member of IEEE Spectrum’s editorial advisory board, but she played no role in the origination of this article.)
CircuitPython caught my eye because I’m the Spectrum editor who oversees our annual Top Programming Languages online interactive. In the interactive, we group languages into different categories based on their typical usage. For the past couple of years, I’ve been getting a small number of complaints because we don’t list Python as an embedded language. (Even Guido van Rossum—Python’s creator—posted a huffy tweet about it.) As the number of actual embedded Python deployments has been a drop in the great software ocean, I’ve been okay with our call, but if Python starts being the basis of a notable share of makers’ microcontroller programs—currently dominated by the Arduino’s C/C++ style of code—we’d need to revisit that decision.
Before I could start getting a feel for the software, though, I needed to make my costume. I had a long, flexible strip of addressable WS1812B LEDs left over from making a color organ for a local monthly musical hackathon, and a US $17 “Nylon Horror Robe” costume purchased for a friend’s haunted house kids’ party last year. So I decided to combine these remnants with a cheap mask from an art supply store and the Gemma M0. The goal was to make a costume that could switch from “spooky” to “disco fun” on demand.
I first cut the LED strip into short lengths: 7 LEDs apiece for each of my forearms and upper arms, 10 LEDs for the robe’s cowl, and eight strips of 8 LEDs for a 64-pixel chest display. Using fabric tape and some reinforcing thread, I attached these LEDs to appropriately sized pieces of felt as a backing support and sewed the felted LEDs into the costume.
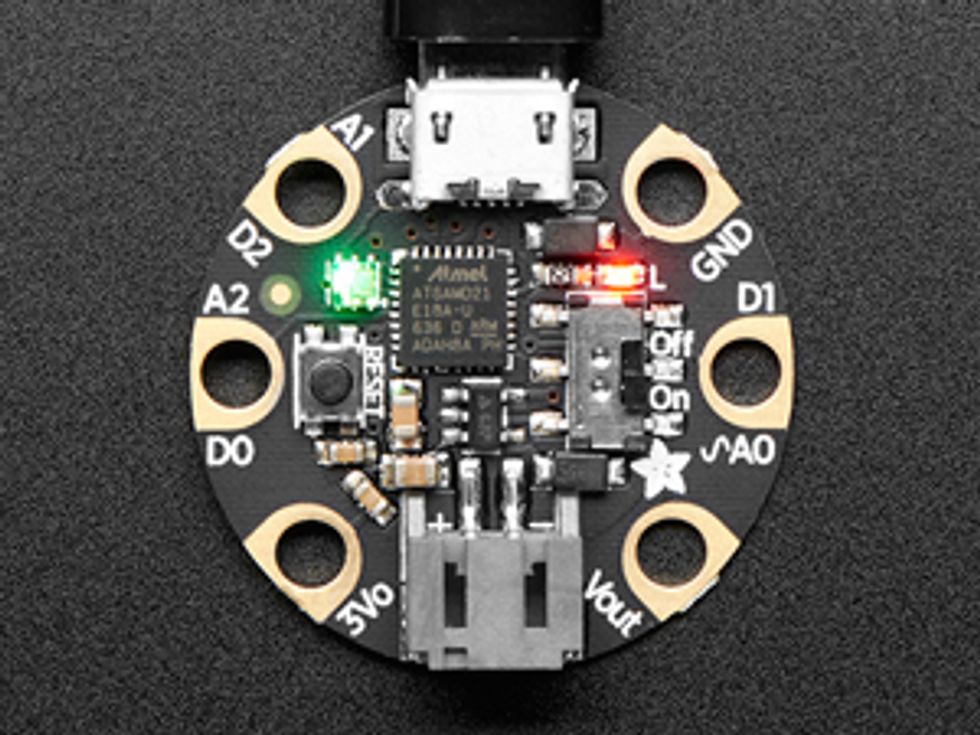
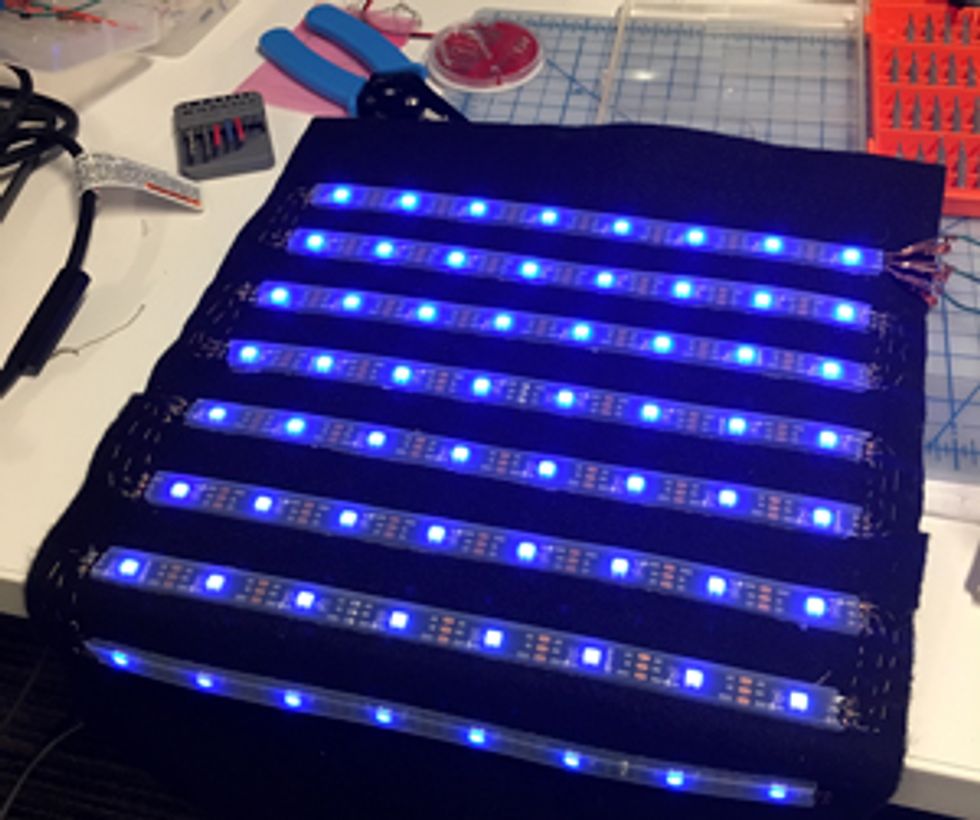 Prêt-à-porter Microcontroller: The coin-size Gemma M0 (top) can be easily sewn onto fabric. The Gemma has few input/output connections, but that’s enough to control many devices via serial connections, such as the LED matrix on the front of the costume.Photos: Top: Adafruit Industries; Bottom: Stephen Cass
Now I needed a power source. WS1812Bs operate best at 5 volts and are power hungry: At the maximum white brightness, each LED draws 50 milliamperes, which adds up fast. Meanwhile, the Gemma M0 can accept up to 6 V, but it operates at 3.3 V. After some experimenting, I settled on using 12 AA batteries. I divided the batteries into four groups, with each group wired in series to provide 4.5 V. I also wired the groups in parallel so they would provide enough current to power the LEDs, as long as I kept the overall brightness dialed down, or illuminated only a subset of the lights. With just 4.5 V going to the LEDs, the Gemma’s 3.3-V output is sufficiently above the 50 percent mark to control the strips without the need for a voltage-level shifter.
Then I needed to wire everything together. The 28-millimeter-wide $10 Gemma M0 has three input/output connections, which can be configured for digital or analog signals or act as capacitive sensors. I allocated one output to the chest display and another to the limb and cowl LEDs. I used the remaining connection as a capacitive sensor to provide touch control: By tapping on the costume above my collarbone, I can toggle through different display patterns.
Initially, I tried to wire all this up using conductive thread. I anchored the thread to the LED strips by threading it through holes that I punched in the strips’ copper connection pads with a needle. Unfortunately, the thread’s tendency to fray at the ends, combined with the close proximity of the pads, made short circuits all too common, and the wrinkles that formed when the robe moved also caused cross-circuit connections. So I pulled out most of the thread and replaced it with old-fashioned wire. I left in only the thread I had used to make a capacitive touch sensing pad, as the length of thread required was short and connected only to the Gemma.
With the costume complete, albeit not the most comfortable thing to wear, I turned to the software. Normally, this would mean writing code in the Arduino IDE, compiling it, and uploading it to the board via a USB link. But the Gemma uses a clever approach. Connect it to a host computer via USB and it will appear as a removable drive. The Gemma will automatically interpret and run whatever is on that drive in a file called “main.py,” and you can open this CircuitPython file using the text editor of your choice. This means you can do live coding with embedded devices: I could adjust the timing or color choices in my LED control code, save the file, and see the results instantly reflected in the costume’s behavior. Once I was happy with the results, I could simply unplug the USB connection.
The downside of CircuitPython is that you don’t have access to the huge array of online advice, code snippets, or third-party libraries that are available for Arduino projects, although Adafruit has created libraries that cover the essentials, such as how to drive LCD character displays. The Python interpreter also uses up a lot of the onboard space that would otherwise be available for project code.
Nonetheless, although it’s still available only on a few boards, CircuitPython is a fascinating alternative to the traditional development cycle. In cases where the code itself is pretty straightforward but requires a lot of tuning parameters to produce optimal results, embedded Python has an advantage. Whether Python gains enough momentum to make significant inroads into embedded development will depend on whether this advantage is marked enough to persuade more hardware and software developers to defect from conventional tools.
This article appears in the October 2017 print issue as “Wearable Tech for Halloween.”


