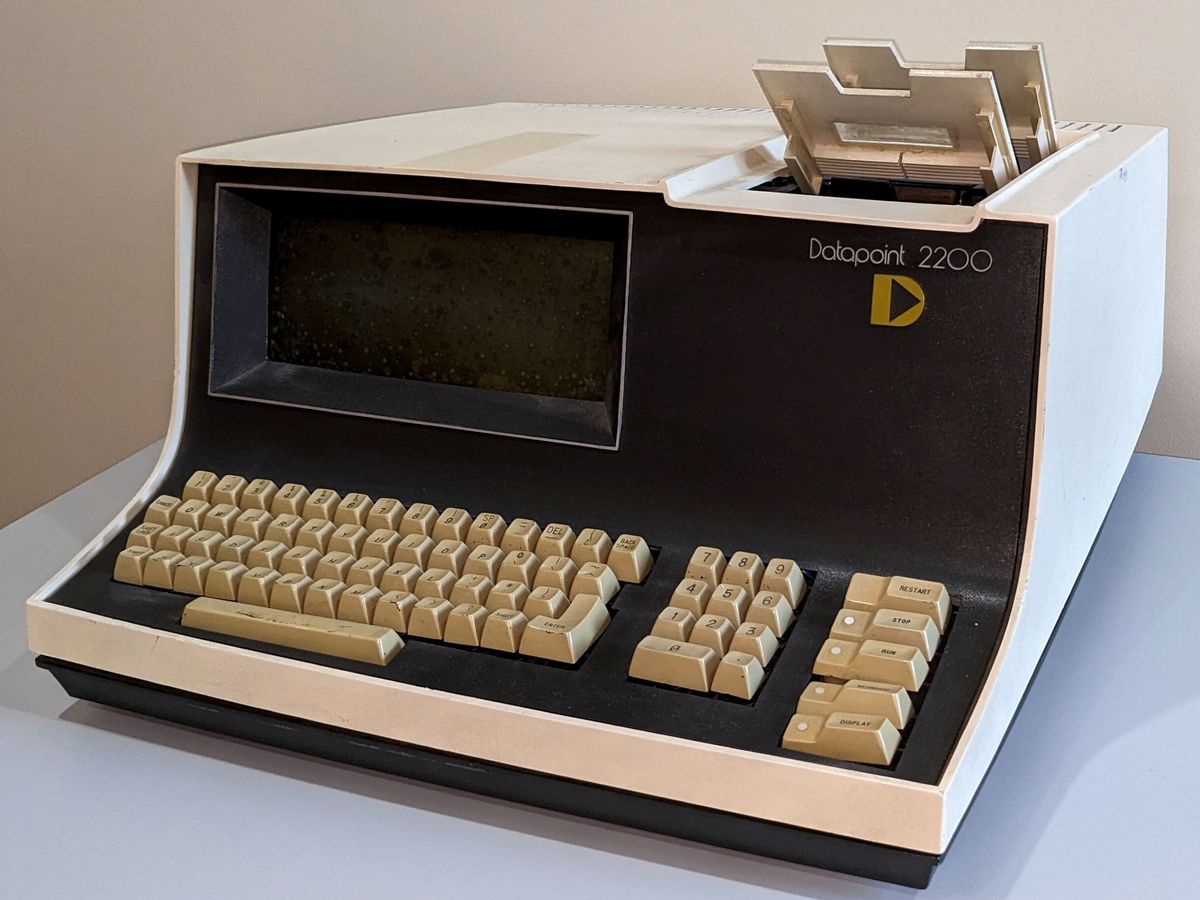
The spacecraft that took men to the surface of the moon and back relied on computers that pushed the state of the art when they were built. Designed by MIT, the Apollo Guidance Computers came with 72 kilobytes of ROM and 4 kilobytes of RAM. This memory used a form of magnetic core memory, where multiple hair-thin wires passed through tiny ferrite toroids to store 1s and 0s. The work of assembling the AGC memories fell to women at Raytheon who formerly worked with textiles, and once you complete the Core64 kit, you will have a newfound respect for their skills.
As the name suggests, the US $180 Core64 kit provides just 64 bits of RAM, but you can get quite a bit more mileage out of it than just the ability to store up to eight extended ASCII characters. I picked up a beta version of the current kit at the last Vintage Computer Festival East from its creator, Andy Geppert, in part because I was impressed at how expandable he’s made it.
There are multiple ways to integrate the kit into larger projects using interfaces such as I2C or USB, or even by connecting directly to the memory lines themselves. You can also use the kit to detect magnetic flux lines, and read the resulting bits that get set. I was able to use it in this way to generate random numbers using the included magnetic stylus, although you’d have to take care to create a setup that eliminates any geometric bias if you want to use those numbers for cryptographic purposes.
Reading a bit from magnetic core memory is destructive—to do a read operation, the computer first tries to clear the bit in question by sending a current through the corresponding vertical and horizontal driver wires that pass through the ferrite cores. Flipping a bit causes a voltage to be induced in the “sense” wire that is threaded through all the cores. So if you detect a voltage, it means that the bit was originally a 1, while no voltage means the bit was a 0 all along. If a 1 is detected, the system must then set that bit back to 1 with a reverse pulse of current on the driver lines.
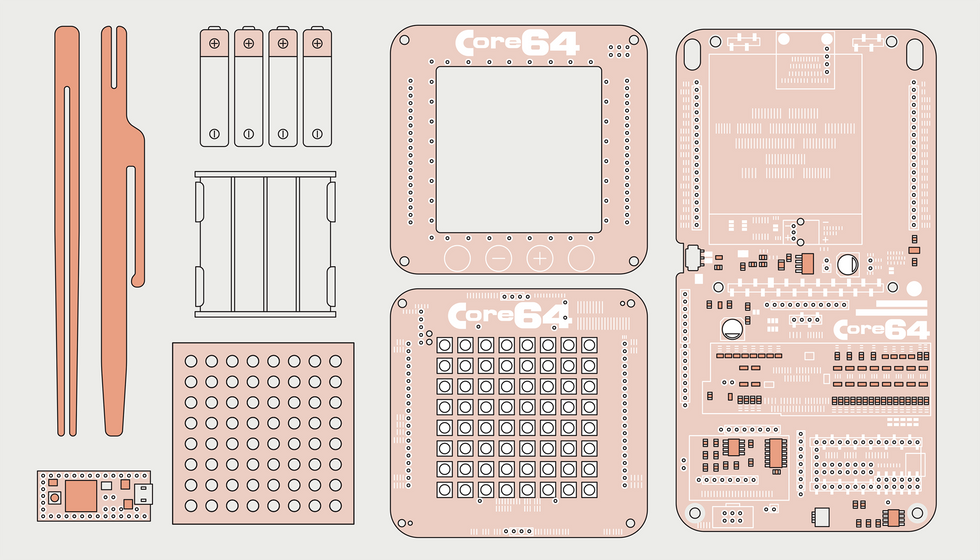 The Core64 kit comes with everything you need to create a self-contained memory, but you can expand it using a number of hardware interfaces, or replace the AA battery pack with a rechargeable battery.James Provost
This may seem like a slow and cumbersome process, but magnetic core memories were an enormous leap forward for computers. They were reliable and allowed true random access to data, unlike the previous generation of digital memory, typically some form of delay-line system, in which all the bits circulated one by one through the memory, so you had to wait till the bit you wanted came round to set it or read it.
In the Core64, the job of reading, writing, and rewriting the cores as needed falls to a Teensy 3.2 microcontroller, which also provides the USB interface and drives an array of RGB-addressable LEDs mounted behind the core memory. Normally, these LEDs indicate the state of the corresponding core, but they can also be used to display scrolling text or simple animations. In fact, thanks to the included lanyard and protective cover sheets, you can wear the entire kit as a badge. (If you’re wondering why you might want to do that, then welcome to the “badgelife” subculture that started with hacker gatherings such as Def Con and HOPE. In a nutshell, think about tricking out a car, but with something light enough to wear around your neck.)
Assembling the logic board the Teensy plugs into is pretty straightforward, although the requirement to cut a tiny power trace on the Teensy does require a careful touch, as does soldering a surface mount connector to the microcontroller. However, this is just a preview of the delicate work to come. If you’ve ever impulsively added a nice head-mounted magnifier or precision tweezers to your Digikey or Mouser order, just in case—well, their time has come.
Unless you have truly preternatural vision, threading the cores—which are about 1 millimeter in diameter—can’t really be done without magnification, and tweezers are essential for manipulating the very fine wire involved. For me the hardest part of the operation was the second step of the memory-weaving operation, when eight ferrite cores have to be placed on each of eight wires, abacus style. It’s very easy to drop a core, and if one escapes your work area, you’ll never find it. I ended up creating a corral of Dungeons & Dragons terrain to contain errant cores from bouncing away, and so managed to only lose two—fortunately four cores are provided as spares.
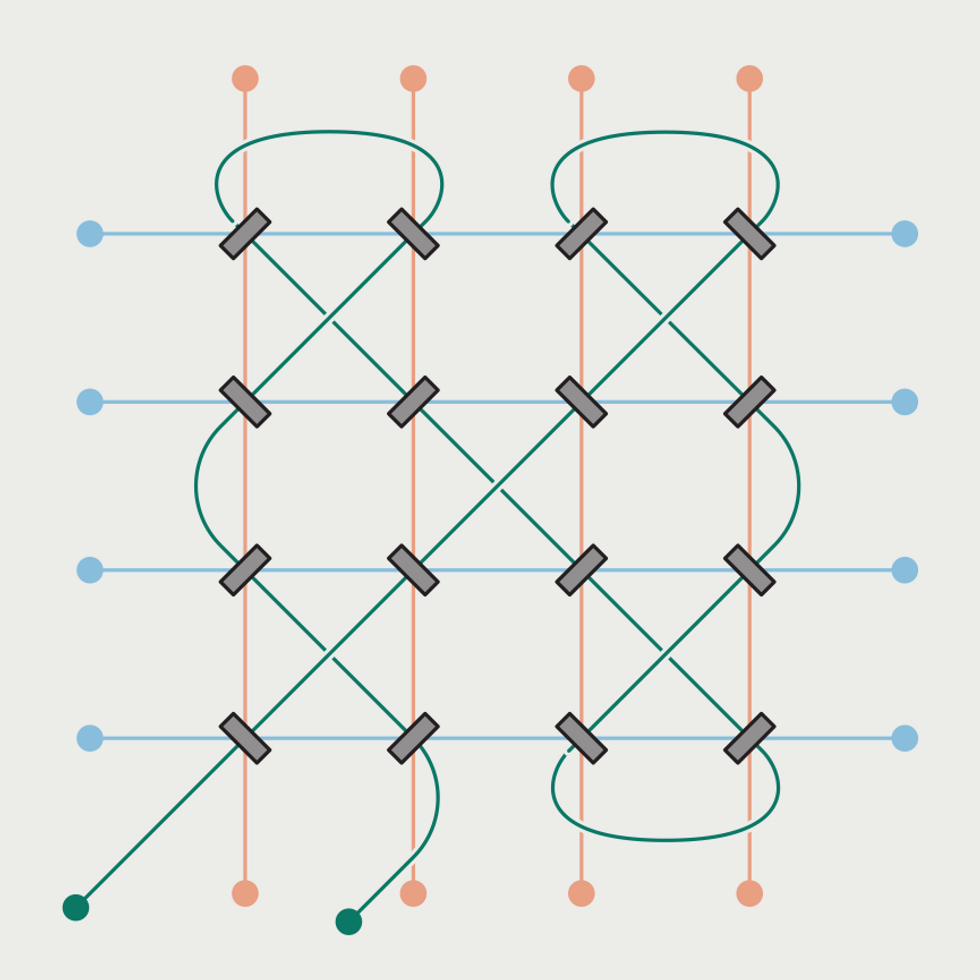 Flipping the magnetic polarity of a ferrite core to represent either a 1 or 0 requires more current than can be delivered by a single horizontal [blue] or vertical [red] drive wire alone. A core at the intersection of two active wires can be flipped, however, and this flipping induces a voltage in James Provost
The rest of the job of weaving the cores, sense, and driver lines together gets progressively easier, but take kit creator Geppert’s advice and don’t try to do it all in one sitting. It’s a job that’s best spread out an hour or so at a time. And don’t be tempted to straighten out and tension all the wires too early—the cores have to be placed at alternating angles, and you will inevitably place one the wrong way around, forcing you to undo and redo your work.
However, Geppert has provided excellent instructions, along with videos of the weaving process, so it’s just a matter of being methodical. The only nit I have is that the documentation describing the firmware and the various modes the kit can be put into is minimal, but as its source code is available on GitHub and well commented, you can skim it if you’ve any questions.
So build and enjoy your old-fangled solid-state memory—after all, 64 bits should be enough for anyone.
This article appears in the August 2022 print issue as “Weave Your Own Memory.”