
 Photo: iStockphoto
Like virtually all New York City apartment dwellers, I am occasionally visited by a mouse looking for a new home. However, I was still surprised to hear a familiar scratching sound emanating from behind my desk late last year. This was because 12 months previously my unusually diligent landlord and I searched for every mouse-size gap in my newly renovated apartment and blocked them all with either metal plates or steel wool.
I put down poison and traps, but they were ignored. I started an increasingly frustrated search for the mouse’s entry point, until my suspicions fell on the gap between the bottom of our apartment’s front door and the sill. It looked just large enough for a small mouse to squeeze under, but I wasn’t sure. So, naturally, I set about building my own indoor wildlife camera system to catch the pest in the act of entering.
I could have tried hooking up our Nest Wi-Fi-enabled security camera, and set it for night vision and motion detection, but the Nest is really designed for monitoring rooms, not small areas like my doorsill. I also wondered if I could achieve my goals without sending a stream of live video from my home to some unknown data center.
Fortunately, I’d spotted what promised to be the ideal solution during the 2016 World Maker Faire in New York City last October. Singapore-based Annikken makes a line of shields that let Arduino microcontrollers communicate with a smartphone via Bluetooth. Previously, these shields worked with either Android or iOS mobile devices, but not both. At the Faire however, Annikken was demonstrating its latest product, the US $79 Annikken Andee U-AIO, which can communicate with both types of device (and the Apple Watch as well).
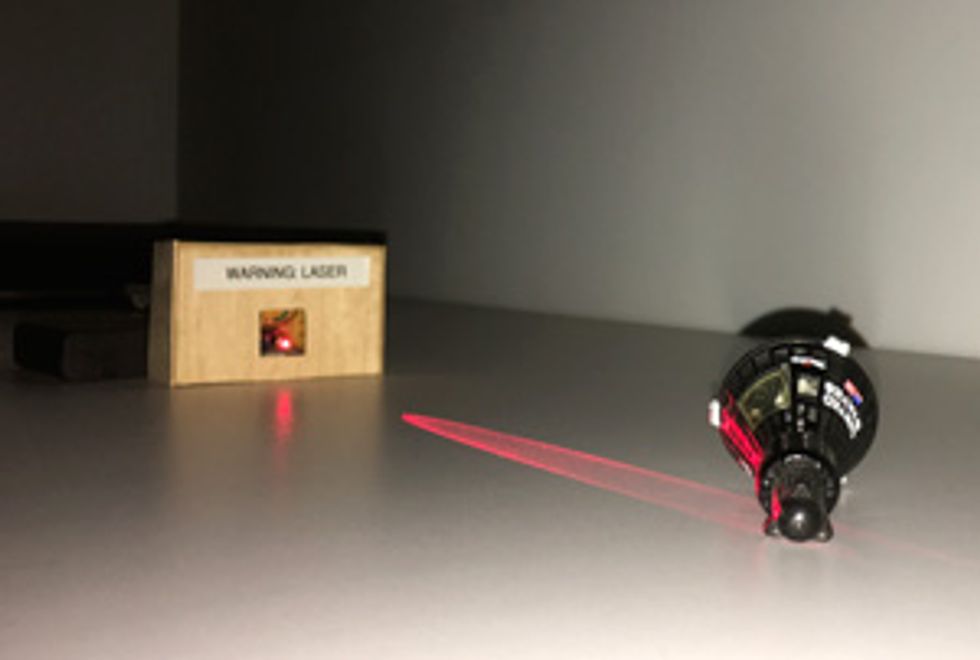
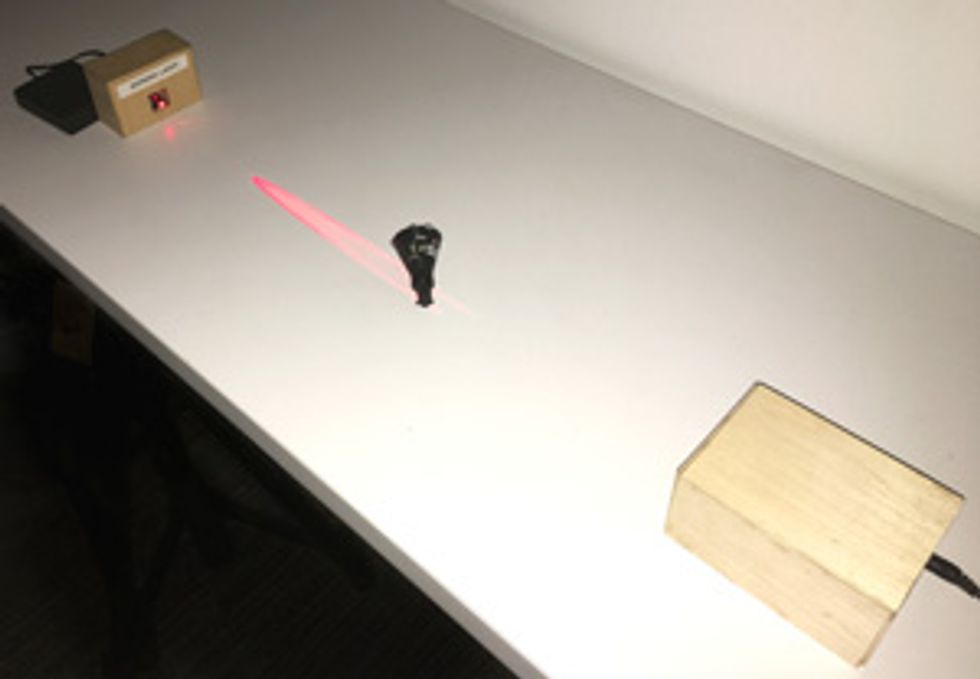
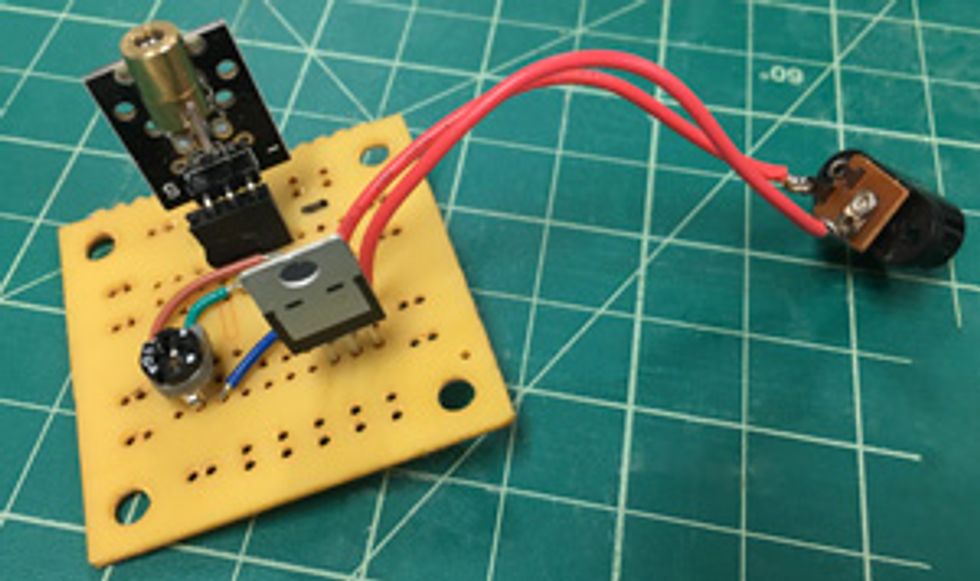
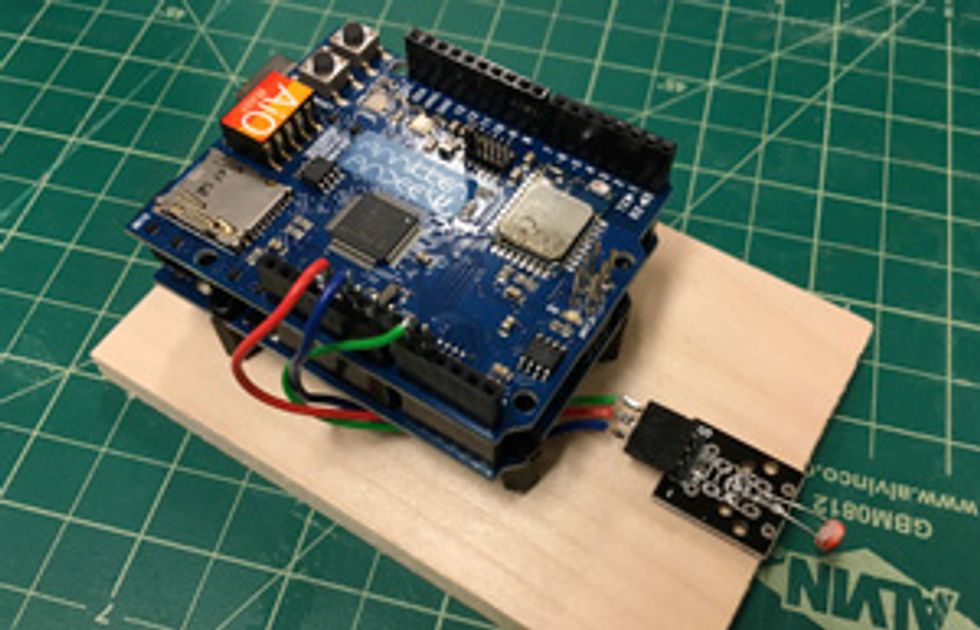 The photo at top was automatically taken by an iPhone when I pushed a mouse substitute (a Mercury capsule model) into the beam of my optical trip wire (second from top). I made the trip wire using a laser module at one end and a photocell attached to an Arduino equipped with an Andee U-AIO shield (lower two photos).Photos: Stephen Cass
I ordered the shield, and then I dug out a laser diode module and photocell from my $27 Elegoo 37-in-1 sensor kit. This kit has a miscellany of 5-volt emitters and sensors mounted on little breakout broads, which is very convenient when I want to throw something together quickly.
The laser module doesn’t come with a collimating lens, so the light spreads out into a broad cone. This would be a pain if I wanted the beam to travel any real distance. But in my situation, with the door being about a meter across, the wide beam was actually an advantage: I didn’t need to be superprecise in positioning the photocell in the path of my optical trip wire. I built a housing for the laser module and hooked up a battery pack, and I connected the photocell to my Arduino Uno board with the Andee shield mounted in place inside another housing.
The Andee U-AIO passes through the Arduino’s pin connectors so that you can hook up your projects to the microcontroller, but not every pin is actually usable. The Andee uses pin 8 to communicate with the Arduino, and when using an Uno it is recommended that you not use pins 11, 12, and 13. (To make up for these lost pins, the new U-AIO shield provides an additional eight digital input-output pins. There’s also a microSD card slot as well for data that’s too big for the Arduino’s memory.)
I connected the photocell to one of the Arduino’s analog input/output pins. I wrote a short program that dumps the value seen at the photocell’s analog pin to the Arduino’s serial port, so that I could see what voltage values were reported when the laser was shining directly on the photocell versus when the beam was blocked. This let me select a suitable threshold value for triggering a camera.
Writing the Arduino software was trivial. I downloaded the software library required to use the Andee from the Annikken website. The library comes with a large set of example programs demonstrating different features, so it was easy to modify the “Automatically Take Photos with Smartphone Camera” example to take a picture with the flash when the analog photocell reading fell below the threshold value.
Once the Arduino, Andee, and photocell were working together, the next step was to set up my smartphone. I used my wife’s old iPhone, which had been retired due to a cracked screen and an exhausted battery. I installed the free Andee app. When launched, it spotted my U-AIO shield, and the graphical interface for my Arduino program popped up.
This bit is actually my favorite thing about Annikken’s system. Typically, communication hardware and software simply focus on providing a channel between the microcontroller and whatever device you’re connecting to. It’s up to you to write the software to do anything else on either end. This means becoming familiar with two different systems and understanding the channel well enough to pass unmangled data. But the Andee spared me from having to take a crash course in smartphone app development, because you code how both ends of the connection behave just once in the Arduino software.
For example, you can specify you want an onscreen message window and a few control buttons for a graphical user interface, and the Andee app will implement those for you. The Andee app can also allow the Arduino to access other hardware present on the mobile device, such as GPS data (exactly what you can access depends on whether you’re using an iOS or Android device).
Unfortunately, I then hit a truly fatal snag in my project. Just as I was about to deploy my mouse detector, I noticed that one of my half-forgotten traps had sprung. No more live mouse to detect! But my system lies in wait for the next intruder, and the mystery of from whence it comes…
This article appears in the February 2017 print issue as “Building a Better Mousetrap.”