
I hate the eye strain that often comes with peering through a telescope at the night sky—I’d rather let a camera capture the scene. But I’m too frugal to sink thousands of dollars into high-quality astrophotography gear. The Goldilocks solution for me is something that goes by the name of electronically assisted astronomy, or EAA.
EAA occupies a middle ground in amateur astronomy: more involved than gazing through binoculars or a telescope, but not as complicated as using specialized cameras, expensive telescopes, and motorized tracking mounts. I set about exploring how far I could get doing EAA on a limited budget.
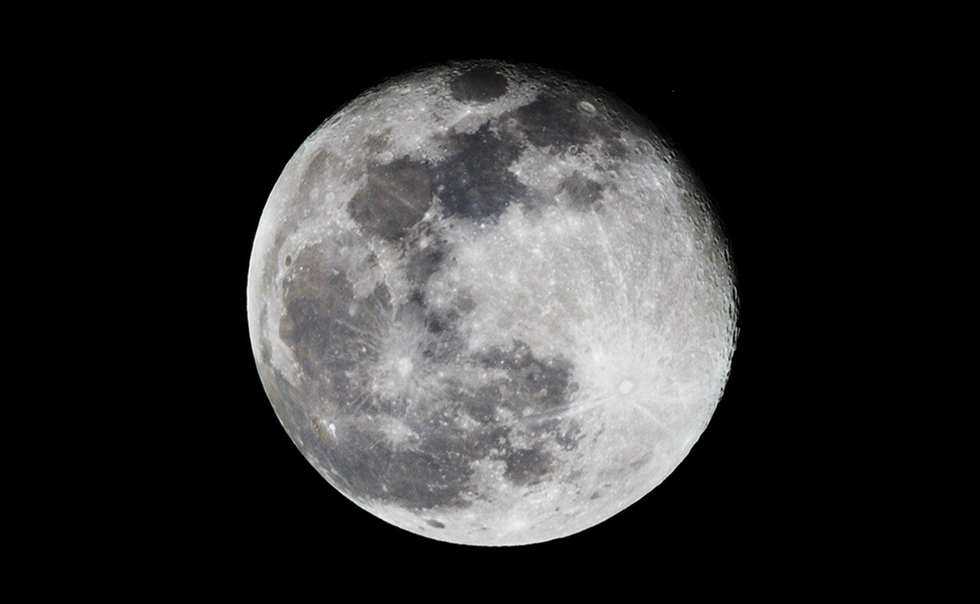

 Electronically-assisted-astronomy photographs captured with my rig: the moon [top], the sun [middle], and the Orion Nebula [bottom] David Schneider
First, I purchased a used Canon T6 DSLR on eBay. Because it had a damaged LCD viewscreen and came without a lens, it cost just US $100. Next, rather than trying to marry this camera to a telescope, I decided to get a telephoto lens: Back to eBay for a 40-year-old Nikon 500-mm F/8 “mirror” telephoto lens for $125. This lens combines mirrors and lenses to create a folded optical path. So even though the focal length of this telephoto is a whopping 50 centimeters, the lens itself is only about 15 cm long. A $20 adapter makes it work with the Canon.
The Nikon lens lacks a diaphragm to adjust its aperture and hence its depth of field. Its optical geometry makes things that are out of focus resemble doughnuts. And it can’t be autofocused. But these shortcomings aren’t drawbacks for astrophotography. And the lens has the big advantage that it can be focused beyond infinity. This allows you to adjust the focus on distant objects accurately, even if the lens expands and contracts with changing temperatures.
Getting the focus right is one of the bugaboos of using a telephoto lens for astrophotography, because the focus on such lenses is touchy and easily gets knocked off kilter. To avoid that, I built something (based on a design I found in an online astronomy forum) that clamps to the focus ring and allows precise adjustments using a small knob.
My next purchase was a modified gun sight to make it easier to aim the camera. The version I bought (for $30 on Amazon) included an adapter that let me mount it to my camera’s hot shoe. You’ll also need a tripod, but you can purchase an adequate one for less than $30.
Getting the focus right is one of the bugaboos of using a telephoto lens
The only other hardware you need is a laptop. On my Windows machine, I installed four free programs: Canon’s EOS Utility (which allows me to control the camera and download images directly), Canon’s Digital Photo Professional (for managing the camera’s RAW format image files), the GNU Image Manipulation Program (GIMP) photo editor, and a program called Deep Sky Stacker, which lets me combine short-exposure images to enhance the results without having Earth’s rotation ruin things.
It was time to get started. But focusing on astronomical objects is harder than you might think. The obvious strategy is to put the camera in “live view” mode, aim it at Jupiter or a bright star, and then adjust the focus until the object is as small as possible. But it can still be hard to know when you’ve hit the mark. I got a big assist from what’s known as a Bahtinov mask, a screen with angled slats you temporarily stick in front of the lens to create a diffraction pattern that guides focusing.
 Stacking software takes a series of images of the sky, compensates for the motion of the stars, and combines the images to simulate long exposures without blurring.
After getting some good shots of the moon, I turned to another easy target: the sun. That required a solar filter, of course. I purchased one for $9 , which I cut into a circle and glued to a candy tin from which I had cut out the bottom. My tin is of a size that slips perfectly over my lens. With this filter, I was able to take nice images of sunspots. The challenge again was focusing, which required trial and error, because strategies used for stars and planets don’t work for the sun.
With focusing down, the next hurdle was to image a deep-sky object, or DSO—star clusters, galaxies, and nebulae. To image these dim objects really well requires a tracking mount, which turns the camera so that you can take long exposures without blurring from the motion of the Earth. But I wanted to see what I could do without a tracker.
I first needed to figure out how long of an exposure was possible with my fixed camera. A common rule of thumb is to take the focal length of your telescope in millimeters and divide by 500 to give you the maximum exposure duration in seconds. For my setup, that would be 1 second. A more sophisticated approach, called the NPF rule, factors in additional details regarding your imaging sensor. Using an online NPF-rule calculator gave me a slightly lower number: 0.8 seconds. To be even more conservative, I used 0.6-second exposures.
My first DSO target was the Orion Nebula, of which I shot 100 images from my suburban driveway. No doubt, I would have done better from a darker spot. I was mindful, though, to acquire calibration frames—“flats” and “darks” and “bias images”—which are used to compensate for imperfections in the imaging system. Darks and bias images are easy enough to obtain by leaving the lens cap on. Taking flats, however, requires an even, diffuse light source. For that I used a $17 A5-size LED tracing pad placed on a white T-shirt covering the lens.
With all these images in hand, I fired up the Deep Sky Stacker program and put it to work. The resultant stack didn’t look promising, but postprocessing in GIMP turned it into a surprisingly detailed rendering of the Orion Nebula. It doesn’t compare, of course, with what somebody can do with a better gear. But it does show the kinds of fascinating images you can generate with some free software, an ordinary DSLR, and a vintage telephoto lens pointed at the right spot.
This article appears in the May 2024 print issue as “Electronically Assisted Astronomy.”


