
Everyone loves looking through a microscope. That got me wondering how hard it would be to convert one to capture images digitally. Sure, you can buy digital scopes ready made, but they tend to be either expensive or of poor optical quality. I wanted one that had decent optics and would also capture a decent-size image.
I started with a Celestron 44102 400x microscope (which cost me US $107 at Amazon) because it was highly rated and had lots of metal in the construction, making it a sturdy platform to attach things to. The only downside was the light source—a mirror. I wasn’t about to depend on anything as primitive as the sun for my high-tech scope, but I left that issue for later.
The first step was to marry it to a digital camera. A webcam would conveniently transfer images to a computer via USB. I spent some time researching the optics and sought out some experts. Here’s why: A microscope is designed to focus the image on the back of your eye when you look through the eyepiece. You can’t just stick a webcam directly onto the eyepiece, because the webcam is also trying to bring an image into focus on the sensor inside the camera, resulting in a kind of optical double jeopardy. However, if you remove the lens from the webcam and hold it the right distance from the microscope eyepiece, you’ll get a perfectly formed image.
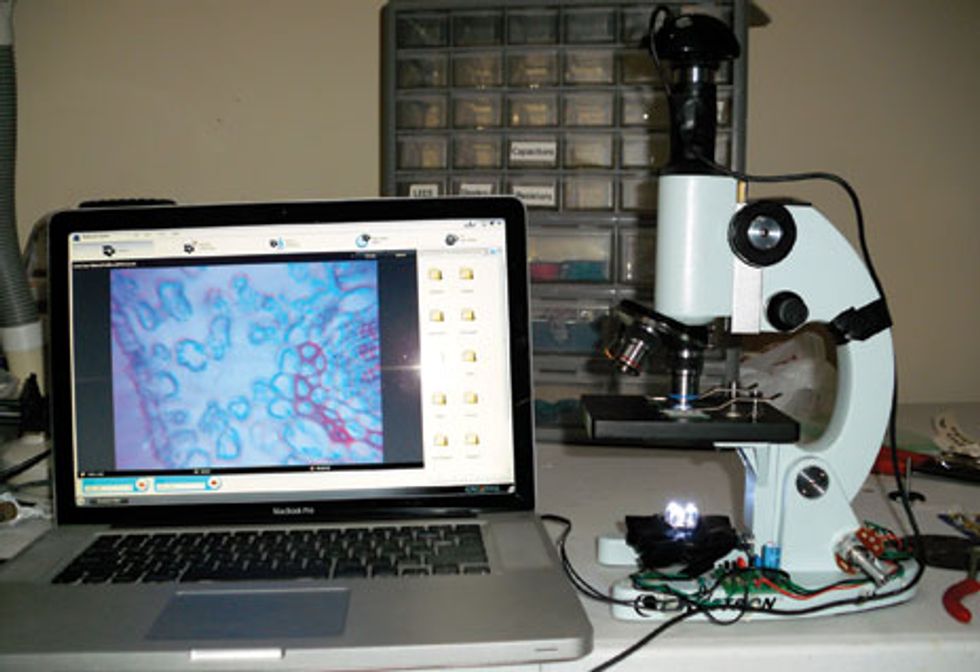
I went back online to shop for a webcam, steering clear of the fancier ones. For one thing, I didn’t need a microphone. Also, I wanted to avoid features like auto focus or face recognition because they might make it hard to get a sharp image. I ended up with a Creative Live Cam Video IM Ultra, a $50 model that shoots up to 1.3 megapixels—a lucky choice because it has a plastic ring that stands half an inch or so away from the body of the camera. After I removed the lens (a fairly painless procedure) and replaced the ring, there was just the right amount of space between the camera and the object to bring the image into perfect focus on the sensor. A few dabs of Krazy Glue attached the ring to the eyepiece, and I had a digital microscope. The first images I captured, using the stock slides included with the microscope, were amazing. Some of the stained plant cells in particular were extremely colorful and detailed.
As satisfying as the result was, it would have made for an awfully simple project. So, on to dealing with that light source issue!
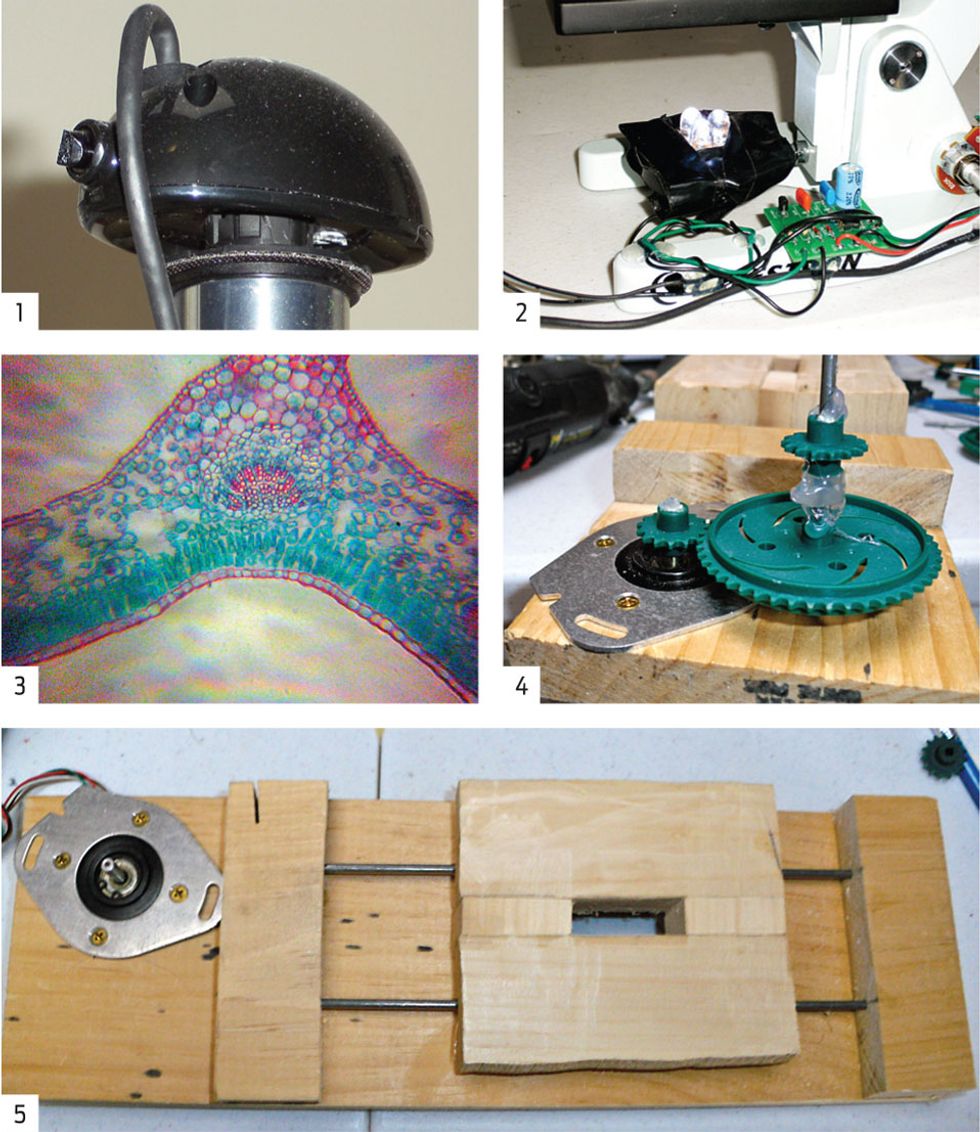
As detailed in a previous article [”Board Certified,” IEEE Spectrum, April 2010], I found a neat little circuit that would let me create a dimmable LED array, using a 555 timer, a transistor, a pair of capacitors, two diodes, and some resistors. I designed a printed circuit board and used a low-volume prototyping service to fabricate the actual PCB. A few weeks and $20 later, I had two perfect boards. I attached one to an array of 10-millimeter white LEDs and an old 12-volt power adapter I had lying around. I now had a finely controllable light source. By turning the 10K potentiometer, I had a nearly infinite variation of lighting levels available.
The result is a fully functional digital microscope—I can control the lighting to capture video or still images regardless of external conditions. And it’s really nice to be able to sit back and look at a big image on my laptop rather than craning my neck over a lens.
For the truly lazy among us, it would be nice to have remote control over the position of the stage that holds the slide. That would let you move the image around with the click of a mouse, "bookmark" interesting features on a slide, or automatically capture high-resolution mosaic images. I decided to try to make a prototype.
With an infinite budget, I would use linear actuators or a rack-and-pinion gear system, but for my prototype I made a chain-driven system, using two 12-V stepper motors ($26 on eBay), one for each of the two drive chains. Next, I needed a controller board that could run the motors. From Peter Norberg Consulting, I got a USB board ($85) that can drive two motors and includes such nice features as the ability to use end-of-motion detection switches. The last components were the gears and the chain connecting them, needed to gear down the motor, which had only eight steps per rotation. These components were surprisingly hard to find. I ended up with a pair of Vex Robotics sprocket-and-chain sets ($30 each). The nice thing about the Vex chain is that you can adjust the length easily, and it comes with a nice selection of gears.
I prototyped in wood rather than metal; it’s cheaper and I have a lot more equipment for it. I built a stage for the slide, with nylon spacers glued to the bottom. Metal rods run through the spacers, letting the stage slide freely back and forth. A chain runs from the reduction gear coming off the motor, connecting to either end of the stage through another gear on the opposite side. It works like a charm, but to build a second gear-and-chain assembly that the first one would sit on, for the other axis, in the limited space available, would require purpose-built gearing and small motors as well as metal or plastic components. In other words, this project addition is not for the do-it-yourself faint of heart.
Meanwhile, I’m happy with my digital LED-lit scope. And a pair of fingers work just fine to move the slide around.
Creative:https://us.store.creative.com/index.html
Peter Norberg Consulting:https://www.stepperboard.com